Learn to Develop an Inventory System in Unity 6 & Blender

- Descrição
- Currículo
- FAQ
- Revisões
Have you ever wanted to design a game inventory system that’s more than just a simple item list? Are you a programmer or artist wanting to blend code and 3D art to create an interactive and immersive Viking-themed inventory? Then this course is for you! In it, you’ll explore both coding and art creation, giving you the skills to build a professional-grade inventory system that can be adapted to any game project.
In this course, Penny and Mike combine their expertise in Unity and Blender to teach you the essential skills for designing, programming, and modeling an immersive inventory system. You’ll benefit from their years of industry experience with detailed explanations and hands-on projects that cover every aspect of development.
This course offers over 15 hours of hands-on content, guiding you through the creation of a functional inventory system with Unity 6 and Blender.
We’ll start by laying a solid foundation with Unity setup and essential 3D modeling skills, then dive deep into creating a full-featured inventory system—from item data storage and UI design to interactive item management and 3D previews.
In this course, you will:
1) Build a fully interactive inventory system in Unity
2) Model and texture 3D assets in Blender for use in games
3) Implement custom editor scripts and UI elements in Unity
4) Combine all the elements in a third-person 3D game environment
The course is broken into two main parts, which can be taken individually or as a complete learning journey:
Part A
In Part A, learn how to program and structure the Inventory System in Unity 6, covering:
Setting up Unity and Using ScriptableObjects
Efficiently organize item data using ScriptableObjects for maximum flexibility.
Item Categorization and Custom Editors
Use enums to create item categories and develop a custom editor for managing inventory items with ease.
Adding, Removing, and Stacking Items
Program functions to add, remove, and stack items, ensuring a smooth player experience.
Inventory Interactions and Testing
Design tests to validate inventory behavior, with runtime testing functions for quick prototyping.
Setting up the Unity Input System
Add custom input actions for interacting with the inventory, such as item dropping and equipping.
Part B
In Part B, learn how to design and integrate 3D items with Blender, covering:
Scope and Specification
Understanding the goals and scope of any project is critical to succeeding. and when it comes to realistic models managing the potential for scope creep is important.
Making The Low Poly Assets
Models have to start somewhere, and making low poly assets allows us to focus on the basics of good topology and form.
Sculpting Details
Sculpting is a fantastic way of adding detail to any model, taking them from basic to unique assets.
Preparing For Texturing
Understand the texturing process and unwrapping your models is much easier than you think!
Texturing Models
Flat models are boring, creating PBR textures bring your models to life.
Baking Textures
Games require optimised assets, we’ll generate high-quality texture maps to apply to your assets takin models with over 100,000 polygons down to a model in the 1000s without compromising on quality.
What students are saying about Penny and Mike’s other courses:
-
This course was incredibly thorough! Penny’s clear explanations combined with Mike’s art direction really made complex concepts accessible.
-
I’ve been using Unity for a few years, but this course gave me new insights into both coding and art integration. The inventory system I built has become the foundation of my latest game!
-
I can’t recommend this course enough. It’s perfect if you want to get hands-on with Unity and Blender—everything was so well structured, I felt like I was building a real project from start to finish!
-
1
 Welcome
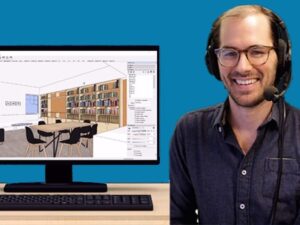
In this video, Penny and Mike will introduce you to the course and go over the content.
-
2
Join the H3D Social Community
This short video will introduce you to the ways to get in touch with the Holistic3D team.
-
3
 FAQs
FAQsImportant Reading on Common Issues students have and how to ask for help.
-
4
An Inventory System Overview
In this video students will gain an understanding of the structure of the Inventory System that will be developed in this course.
-
5
Getting Started with the Unity Package
In this video students will follow along while they setup and configure Unity to use the starter package supplied with the course.
-
6
Item Data Structures with Scriptable Objects
In this video students will learn how to use scriptable objects to store the data for inventory items.
-
7
Creating Scriptable Object Assets for Inventory Items
In this video students will learn how to program an enum to specify the category to be used to classify an inventory item.
-
8
Building an Inventory System
In this video students will begin to write the Inventory System class along with the Inventory Slot manager.
-
9
Adding Items to the Inventory
In this video students will learn how to add items into the inventory in addition to creating a quick testing function to add items at runtime.
-
10
Managing the Item Adding Process
In this video students will be challenged to complete writing the method that will manage adding stackable and non-stackable items to the inventory.
-
11
Testing the Item Adding Process
In this video students will learn how to test out the adding of items to the inventory to check the AddItem() method is working as expected.
-
12
Writing a Custom Editor to View the Inventory Part 1
In this video students will learn how to begin constructing a custom editor to present the inventory items in a table in the Inspector.
-
13
Writing a Custom Editor to View the Inventory Part 2
In this video students will learn how to use the GUILayout element to position text labels in the custom editor.
-
14
Writing a Custom Editor to View the Inventory Part 3
In this video students will complete the inventory system's custom editor by drawing out the values in each slot.
-
15
Removing an Item from the Inventory
In this video, students will be challenged to write the code that will remove items from the inventory.
-
16
Making Pickup Items
In this video students will create game objects that can be picked up when the player walks over them. These items will be later added to the inventory system.
-
17
Adding Picked Up Items to the Inventory
In this video students will be challenged to place the picked up items into the inventory system and complete writing the PickUpItem method.
-
18
Managing Bundle Pickups
In this video students will check if the inventory is picking up bundles of items correctly and debug it, if it is not.
-
19
Dropping Items Input Setup
In this video students will learn how to setup the Unity Input System to add new input actions for the dropping of items out of the inventory.
-
20
Dropping Items from the Inventory
In this video students will learn how to remove items from the inventory by specifying both the slots numbers and item types.
-
21
Handling Multiple Item Drops
In this video students will be challenged to develop a more robust RemoveItems method that handles the removal of items across Inventory slots.
-
22
Placing Items back into the World Part 1
In this video students will extend the scriptable objects to link back to a prefab that can be instantiated when items are dropped.
-
23
Placing Items back into the World Part 2
In this video students will learn how to instantiate a prefab into the environment to represent a dropped item.
-
24
Adding Physics to Dropped Items
In this video students will learn how to add physics to instantiated inventory items when dropped.
-
25
Aligning Dropped Numbers to Inventory Numbers
In this video students will learn how to ensure that the number of prefabs created during the dropping of items is the same as the number of items being taken out of the inventory.
-
26
Adjusting the Physics on Dropped Items
In this video students will learn how to cherry pick the way the physics works on inventory items.
-
27
Inventory System UI Design
In this video students will gain and understanding of the wide range of layouts an inventory user interface can take.
-
28
Setting up the UI Elements
In this video students will learn how to bring in external assets to use with the Inventory UI design and setup the sprites.
-
29
Laying out the Inventory UI
In this video students will learn how to add and resize panels for the UI as well as create 9-sliced sprites.
-
30
UI Resizing Controls UI
In this video students will learn about the variety of different layout controls available for aligning panels and other UI items.
-
31
Creating a 3D Preview UI Window
In this video students will learn how to create a camera that renders a 3D object to a texture for display in the UI.
-
32
Tab Controls for Item Type Selection
In this video students will learn how to construct tab buttons out of UI toggles and style them to fit in the tab panel.
-
33
Working with Toggle Group Controls Part 1
In this video students will learn how to setup a toggle group and colours for toggles being on and off.
-
34
Working with Toggle Group Controls Part 2
In this video students will complete adding the toggles to a group and test that they are all turning on and off.
-
35
Detecting Toggle Selection
In this video students will learn how to add code to a toggle group to automatically setup listeners on each child toggle that will report the toggle selected.
-
36
Adding a Scrollbar View for Displaying Items
In this video students will learn how to create a scrollview with scrollbars that can auto-resize to fit inventory items in it.
-
37
Designing a Prefab for Inventory Item Display
In this video students will learn how to construct a prefab to use for displaying the items in each slot of the Inventory inside the grid display.
-
38
Instantiating Inventory Item Buttons
In this video students will learn how to setup the item button prefab and procedurally instantiate it into the scrollview content area while setting the image and item count.
-
39
Sorting Inventory Items into Tab Categories
In this video students will learn how to sort the items in the inventory according to the selected tab.
-
40
Displaying Item Previews in 3D Part 1
In this video students will learn how to start adding 3D models into the environment to use as the 3D previews in the inventory.
-
41
Displaying Item Previews in 3D Part 2
In this video students will learn how to pickup the 3D preview items and store them in a dictionary for use in the inventory manager.
-
42
Displaying Item Previews in 3D Part 3
In this video students will learn how to link the individual inventory items to the display of the 3D preview items.
-
43
Opening and Closing the Inventory
In this video students will learn how to program a keypress to open and close the inventory panel.
-
44
Freeing the Mouse
In this video students will learn how to lock and unlock the mouse cursor so it is available for use with the inventory window.
-
45
Adding Picked Up Items to the Inventory UI
In this video students will learn how to link the UI part of the inventory with the virtual management of the inventory.
-
46
A Better Way to Open and Close the Inventory
In this video students will learn how to toggle the visibility of a UI panel and all it's children gameobjects.
-
47
Synchronising Picked up Items to Tab Categories
In this video students will learn how to ensure newly added items are displayed under the correct tab in the inventor.
-
48
Managing the Visual Display of Item Counts
In this video students will refactor the slot code to better manage the inventory item count and update it visually on the button.
-
49
Dropping Selected Items
In this video students will learn how to add a drop button to the inventory panel to drop selected items.
-
50
Dropping Items back into the World
In this video students will learn how to instantiate game objects back into the scene when they are dropped from the inventory panel.
-
51
Specifying Item Drop Numbers
In this video students will learn how to specify the number of items they want to remove from a slot.
-
52
Customisation Challenge
In this video students will be challenged to extend their inventory with new fields and functionality.
-
53
Adding a New Item Challenge
In this video students will be challenged to add a new item model in the project and ensure it works with the inventory system.