Cinema 4D Complete : Vol. 1 The Essentials

- Descrição
- Currículo
- FAQ
- Revisões
This training is the first volume of the most complete Cinema 4D course you will find !
You’ll dive into the basics of Cinema 4D, and how to get a good understanding of the core concept of this wonderful 3D application.
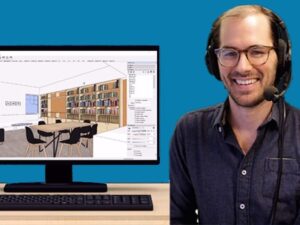
I’m Lionel VICIDOMINI, a Maxon Certified Instructor and Motion Designer based in Paris, France. I believe that in order to truly master a software you have to learn it by the details. I have created this training, the first one of a series, to create a video manual of Cinema 4D and to be the most thorough possible while being entertaining.
In this volume you will see:
-
A complete tour of the interface
-
How to navigate efficiently in the 3D viewport
-
The display options of the viewport
-
How to customize the interface
-
The hidden options of the object manager
-
Tips and tricks on how to manipulate lots of objects
-
The coordinate system
-
The layer manager
-
The software preferences to know
-
How to set up your project and save the changes
-
The library and how to search it
-
The parametric objects explained
-
How to move, scale and rotate your objects quickly and efficiently
-
The generators
-
Workplane and snapping settings explained
-
How to place your objects exactly where you want
-
Practical workshop: how to model a toy Flying Saucer using parametric objects only
This training is aimed for the beginner eager to jump into the 3D world, as well for the more seasoned graphic designer who wants to deepen his knowledge of the features of this wonderful software.
You don’t need to watch every single video to learn Cinema 4D, you can do it gradually by jumping from video to video along your way. Each lecture is designed to be short and packed with information.
You can follow this tutorial with Cinema 4D Lite which is bundled with After Effects CC.
In the next volume you will learn everything there is to know about modeling.
Are you ready to dive into the 3D world ? Let’s get started !
-
1
 Exercice Files and Projects
 -
2
 A brief tour of the interface (S24 and before)
This video will take you on a tour of the interface, its basic components, how things are organized within Cinema 4D
-
3
R25 and + : Using the old layout to better follow the tutorials
-
4
R25 and + : The new default layout
-
5
Navigating the Viewport
Navigating in the 3D world is the first skill you should acquire. In this video we'll see how to do that with ease.
-
6
Navigating the Viewport : The Camera Modes
You can be even more precise when navigating the 3D views by using the different camera mode options.
-
7
Framing Objects
We are going to see various ways to frame an object, or a group of objects, or the whole scene, to navigate even faster.
-
8
Cameras
The camera is very important feature in 3D. You are always seeing your objects through a camera, whether it's the default camera, or one you've created yourself. It's very important to know how to manage them and not to confuse them.
-
9
Views Windows
You do not need to limit yourself to an unique views, you can have up to 4 views panel at the same time, to see your scene from every angle imaginable.
-
10
Perspective and Orthographic Views
Along the perspective window, there are several others views, called "orthographic" views, which allows you to see your scene from a 2D point of view, or a special 3D projection, such as isometric camera.
-
11
Shading of the Viewport
The shading display options allow us to see our 3D objects with the polygon lines drawn on them, or to see through them, or to see a simplified version.
-
12
Level Of Detail
The Level Of Detail, or "LOD" is quick way to simplify the geometry of a scene, to make it faster to display and navigate.
-
13
Viewport Filters
The Viewport Filters are a great way to hide and unhide objects quickly in the viewport, as long as different display helpers that can quickly clutter the view.
-
14
Viewport Effects
The Viewport Effects allow us to see a very good approximation of the shading of our objects, making the scene easier to the eyes. Different effects, such as the Depth Of Field, SSAO, Tesselation can drastically alter the looks of our objects, for the better.
-
15
Display Options and Display Tag
The Display Tag is great way to override the shading of a single object, to better suits our needs.
-
16
Configuring the Viewport
In this video we'll see various ways to better tailor the viewport to our liking.
-
17
Customizing the Interface
Cinema 4D is renowned for its very agile and plastic interface. You can alter it very easily and quickly, to allow you to cover any situation.
-
18
Going Further with Customization
You can also customize the commands and create button you can place anywhere in the interface.
-
19
Getting to know the Object Manager
The Object Manager is the core of Cinema 4D. It is the place that will hold and lists all the object of the scene, for an easy access. It's very important to master it if you want to select and manage your objects effortlessly.
-
20
Selecting Objects
In Cinema 4D there are several ways to select and move objects. It can be confusing when you learn the software for the first time. This video aims to clearly make the difference between the different tools.
-
21
The Object Hierarchy
The hierarchy is a very important concept in 3D. In this video we'll explore in depth to see what it means.
-
22
Filtering the Object Manager
As the Object Manager lists all the objects in the scene, it can very quickly get overwhelming. Fortunately there're several tools that allow us to better sort these objects.
-
23
Hiding and Unhiding Objects
In this video you'll see how to manage the visibility of objects, whether in the Object Manager or the Viewport.
-
24
The Bookmarks
The Bookmarks are a quick and easy way to control the visibility in the Object Manager of a list of objects.
-
25
The Solo Button
The Solo Button is perfect to isolate in the viewport an object or a selection of objects, to better concentrate and work on it.
-
26
The Layer Manager
The Layer Manager is the ultimate tool to manage efficiently your scene containing a huge number of objects.
-
27
The Content Browser
-
28
Introducing the Attribute Manager
The Attributes Manager is the window to tweak, arrange parameter of almost anything inside Cinema 4D.
-
29
Navigating the Tabs
In this video you'll see how to navigate through the different tabs of the Attributes Manager.
-
30
The Basic Parameters : Name and Color
All objects in Cinema 4D share two common tabs. In this video we'll see the different options inside the basic parameters, which will allow us to change the color, name and visibility of each object.
-
31
The Coordinate Tab : changing multiple value at the same time, using formulas
Through the coordinates tab of the objects, we can dispose and arrange many objects at the same time. Using formulas we can arrange and dispose objects through mathematical operations.
-
32
Local and World Coordinates : What's the Difference
In this video you'll learn about a very important 3D concept : the difference between the local and world coordinates. Through the Coordinate Manager, we'll see when you need to use one system of the other.
-
33
Size VS Scale
In this video we'll explore the very important difference between the size and the scale of a object and why you should not confuse them.
-
34
The Basic Primitives
In Cinema 4D the primitives are all the basic parametric objects, that is the objects you can change anytime by tweaking its parameters.
-
35
Other Primitives
We continue our tour of the parametric objects.
-
36
Using the Generators and How Parenting Works
The Generator object needs to be parented to other objects in order for them to work. We'll see then a selection of the most useful generators.
-
37
The Array Generator
The Array Object can clone and distribute objects along a circle.
-
38
The Boole Generator
The Boole generator can assemble two object into a new one by fusing them, or deleting one part off the other, or by intersecting the two geometries.
-
39
The Instance Generator
The Instance Generator allow us to create dynamic copies of an object.
-
40
Selecting, Moving, Scaling and Rotating the Objects
In this lesson you'll see all about moving objects, scaling and rotating them on each axis.
-
41
Advanced Options on Moving the Objects
When you manipulate several objects together, there are options to further refine your manipulations.
-
42
Aligning Objects Together
Cinema 4D by default creates object in the center of the world, making it difficult to arrange objects together. We'll see in this video how to avoid these problems.
-
43
Using the Grids to precisely align and move Objects
The grids will allow us to work more precisely when arranging our objects.
-
44
The Snapping Tools
The Snapping options are the ultimate tool if you want to work very precisely.
-
45
Altering the Axis Center of Objects to Align Them
In this video, we'll see how to manipule the axis center of objects, to better arrange et manipulate them. We'll see then how to do it by using a null object to preserve the original center of the object.
-
46
Duplicate, Arrange, Center and Randomize Tools
Cinema 4D has several tools to duplicate, instance and arrange objects on a massive scale.
-
47
Quantizing
Quantizing will allow us to move, scale or rotate objects by precise increments.
-
48
Using Advanced Technics to Precisely Align Objects Together
Using all the knowledge we acquired, we'll create a spiked platonic object using the grids and snapping tools.