AIR-BRUSHING / RENDERING THE FASHION ILLUSTRATION
In this lecture you will complete the airbrushing and rendering techniques to complete the fashion illustration.
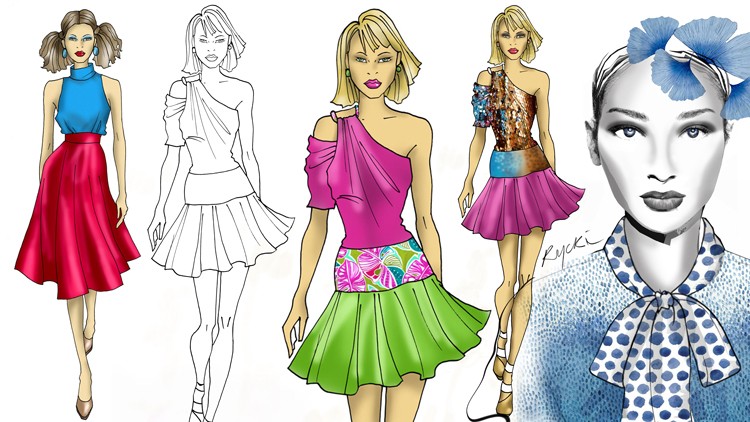
Select specific areas of garments / skin / hair etc to render. You can select the air-brush tool and learn to manipulate the opacity, size and flow of the colour from that brush. ( The soft ) air-brush is recommended for beginners because it has the most forgiving and soft look with the finish. Even though there are a large amount of brush tools to select - these take experimentation and practice to be able to get specific required looks & results. The soft brush gives you greater scope and at a beginners level - you can achieve 'better' results faster. Also learn to created depth through shading and working with multiple layers to create realism and a more refined look to your digital illustrations.
TEXTILES AND FABRIC INSERTION.
Learn to select and insert textile prints and fabric textures into specific selected areas.
This is an exciting and unique feature when it comes to digital fashion illustration. With the huge variety of fabric print designs, textures and innovative fabrics constantly emerging into the fashion world - fashion designers can 'drop' these fabrics directly into their illustrations - 1. To show accuracy of the fabric 2. For the speed of achieving the best result faster.
Digital fabric insertion also lets you expand these skills into Fashion Boards / Presentation Boards and media marketing graphics - simply by learning the skills to insert fabrics into shapes and present your work in a more creative style.
SAVING YOUR WORK.
Learning to name your work, save your files in the correct formats and file your work for future access is a vital part of working in the digital space.
Photoshop uses PSD files - which means that the layers will be saved in the photoshop format as you have been creating and working layers. This also means that you are able to come back to that file and make alterations and edits - that only the digital space can offer.
Eg: you can delete a blouse colour, and change it to a printed fabric.
You are able to use the same illustration and garments styles and show re-fabrication and range expansion of those designs. This saves money and time when a designer wants to see garments in a variety of fabrics and colours to ensure that the range designs work together as a cohesive collection.
You are also able to FLATTEN your layers and create JPEGS or PDF files depending on the purpose and requirements of the end-use files.
FILE sizes for presentations are maintained at the highest possible resolution. This gives your work the print quality, sharpness and detail necessary for fashion boards and presentation.
This can be reduced as required if you are working on slide presentations or images that are inserted into text documents. File size must be assessed individually for each output requirement.
SOCIAL MEDIA FILES.
Social media files are much smaller in resolution and in size. Files can be reduced dramatically and reinserted into Instagram / Facebook resolution. This can be done by first flattening the image. Then GO TO > File > EXPORT > SAVE FOR WEB ( which will give you re-sizing and file size options to create files that will travel across social media more efficiently ).