Fundamentals of Photo Editing in Darktable | Free Software

- Descrição
- Currículo
- FAQ
- Revisões
Want to learn how to properly edit your photos using the popular and FREE RAW Processing Software Darktable? Want to know how to properly set up your camera for RAW photography? Looking to finally learn the Darktable layout, panels, and modules so you aren’t “stabbing in the dark” when making image adjustments?
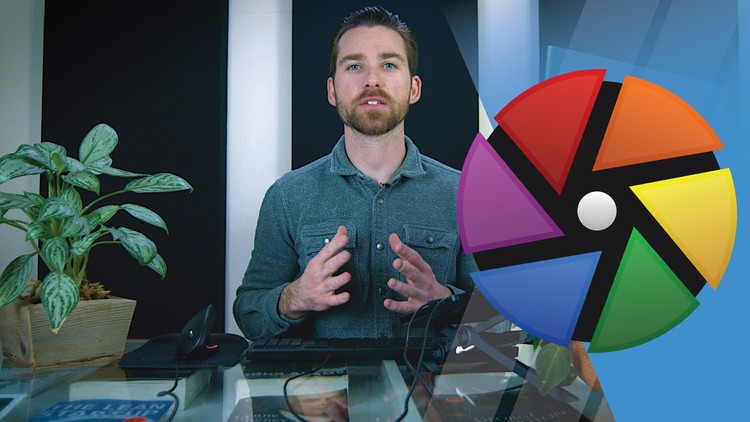
I’m Mike Davies, photographer, course instructor, and owner of Davies Media Design. I’m here to introduce you to one of the most powerful pieces of RAW processing software on the planet. The best part? It’s totally free! (Don’t worry – if your camera can’t take RAW photos, this software works with JPEGs, too!)
You’ll quickly find out in this useful course that Darktable is an amazing free alternative to premium software like Adobe Lightroom.
In this course, I provide:
-
An introduction to Darktable and RAW Photography
-
Instructions on how to take RAW photos with your camera
-
An overview of importing RAW images to your computer and opening them in Darktable
-
An in-depth look at the Darktable layout, including updates to the layout in Darktable 3.4 and 3.6.
-
A demonstration of all the Panels found in Darktable
-
An introduction to modules, as well as an in-depth look at my favorite modules for photo editing
-
An overview of how Darktable’s “pixelpipe,” or module order, works to help you get the most out of your editing
-
Definitions for photo editing and Darktable concepts
-
Insight into why certain modules/image adjustments are used for RAW editing
-
Step-by-step instruction on how to edit/remove/add your photo’s:
-
Exposure
-
Shadows and Highlights
-
Tone Curve
-
Color Balance
-
White Balance
-
Noise
-
Sharpening
-
Vignette
-
-
Exporting guidelines and recommendations
Whether you’re a casual photographer familiar with photo editing, or someone looking to learn professional editing or RAW image processing for the first time, this course is perfect for you! My lectures are easy for beginners to follow, but in-depth enough for anyone to walk away knowing more about Darktable and image editing than they previously did.
As an instructor on Udemy, my courses have over 17,000 students and a 4.8 star rating. Plus, I personally answer your questions about Darktable and photo editing, and encourage feedback to improve the course.
What Students Say About the Course
“I am a beginner in photo editing, and I chose Darktable for raw processing, because the “industry standard” LR’s [Lightroom] pricing for me is just too expensive. When I first opened DT, I had no clue how to start, I needed some help. This course provided exactly what I needed for my first project. Of course, I did not become a master overnight, but it I am heading to the right direction now.”
-Gergely L. | 5-star rating
“I’m working on nighttime photography and found this to be very helpful.”
-Yvonne J. | 5-star rating
“Excellent clear presentation.”
-Guy W. | 5-star rating
Lifetime Access
It’s time you finally mastered RAW photo editing and Darktable! Join over 600 students and enroll today for lifetime access – including access to future content added to the course.
-
1
 Course Intro
Welcome to the Fundamentals of Photo Editing in Darktable course! Get a sneak peak at what's inside the course and learn a bit about Michael Davies, your instructor for the course.
-
2
Introduction to Darktable
In this lecture, I provide an introduction to the RAW processing software Darktable! I describe what makes it different from Adobe alternatives, and why you'll love editing your RAW photos with this program!
-
3
How to Take RAW Photos (Camera Settings)
Learning how to edit RAW photos is all well and good, but how do you take RAW photos with your camera in the first place? In this lecture, I show you how to change your camera settings to capture RAW photos, plus how to create JPEG back-ups for those of you who can't fully get away from editing JPEGs just yet.
-
4
Download and Install Darktable
Now that you know how to take RAW photos with your camera, you'll need to download RAW processing software to be able to open and edit those photos. In this lecture, I show you where and how to download Darktable for free (it is an entirely free program).
-
5
Import RAW Photos to Your Computer
The next step in the process of editing your RAW photos is learning how to import the RAW photos from your camera to your computer. In this lecture, I show you how to do just that - describing two different methods for importing your photos.
-
6
Open a RAW Image Into Darktable
The first step to understanding Darktable is learning how to open a photo into the program. In this lecture, I cover opening your first photo (or group of photos) onto the Collections page, and provide an introduction to the default Lighttable screen.
-
7
Why There's No Save Button in Darktable
The thing that perplexes new users the most about Darktable is that there is no "save" button. In this lecture, I explain why that is and how your edits are saved while you work in this software.
-
8
 Intro to Darktable Quiz
Test your knowledge learned in this section!
-
9
Navigation Panel
The first lecture in the "Darktable Layout" section covers the very first panel in the upper left corner of the Darkroom tab. This panel is known as the "Navigation Panel" and performs various zoom functions while also showing you where you are located on your image.
-
10
Snapshot Panel
The "Snapshot Panel" is the first of many unique panels in Darktable. It provides great features for capturing your photo in is current editing state and comparing that "snapshot" to future renditions of your image while you edit. I explain the panel in detail in this lecture.
-
11
History Panel (Darktoom Tab)
Next up, I cover the "History Panel" in Darktable. This panel displays the "history stack," an important feature in Darktable that shows you the edits you've made on your photo in chronological order. This allows you to review changes made to your image, and can even be saved as "styles" for future use in other photos.
-
12
History Panel (Lighttable Tab)
There are actually two History Panels in Darktable - one in the Darkroom tab (which I went over in the last lecture) and one in the Lighttable tab. The Lighttable Tab version of this panel has more features and functionality, which I'll go over in this lecture.
-
13
 Important Changes to Modules Layout in Darktable 3.4 or Newer
Darktable released versions 3.4 and 3.6 in late-2020 and mid-2021 with some major updates to the modules layout. In this article, I address these changes and how you can make adjustments to your modules layout to follow along with the lectures in this course.
-
14
Introduction to Modules
Modules are basically the most important feature in Darktable. They are where you will perform almost all of your image editing and adjustments. In this lecture, I provide an introduction to what modules are, the order modules are applied to your image (known as the "pixelpipe"), and how the module workflow applies to your image editing.
-
15
Bottom Bar
Below the image window in Darktable is the "Bottom Bar." This area not only displays the camera settings at the time you took your photo, but also has a series of features like image previewing, color and out of gamut warnings, and the ability to quickly add styles to your photo based on modules added to your "favorites."
-
16
Duplicate Manager
The duplicate manager panel allows you to create a duplicate of your image, then edit that duplicate as a separate image. This provides a great way to "fork" your project in a different direction, allowing you to make separate edits to the same image.
-
17
Color Picker Panel
The Color Picker Panel allows you to select a single pixel or pixel area and analyze the color values of that pixel. I provide an in-depth look at this panel for this lecture.
-
18
Tagging Panel
Tagging is a great way to add keywords to your photos, group photos based on similar qualities, and be able to easily find any photo in your collections in Darktable. In this lecture, I go into all the ways to tag a photo and use those tags in your workflow.
-
19
Darktable Layout Quiz
Test the knowledge you acquired in this section!
-
20
Introduction to Photo Editing In Darktable
Alright - you have finally mastered the Darktable layout. Time for the good stuff! In this section, I'll be diving into image editing in Darktable. I'll show you the most commonly used modules for editing and adjusting your photos.
-
21
Correcting Exposure
The first module I'll cover is the "Exposure" module. This module is a great way to increase or decrease the exposure levels of your image for over- or under-exposed lighting.
-
22
Shadows and Highlights
The Shadows and Highlights module allows you to recover details hiding in the shadows - or highlights - of your image. This is a great way to rebalance lighting in your photographs while also adding more detail to the image.
-
23
Tone Curve
In this lecture I cover the Tone Curve for adjusting your image's brightness/contrast and colors using a gradient curve.
-
24
Color Balancing and Color Correction
Darktable has many modules for color correction, including the Color Balance and Color Correction modules. I show you which module I prefer to get the best colors out of your image. You'll get an in-depth look at correcting the color channels of your image, as well as the hue and saturation.
-
25
White Balance
Your camera's EXIF data will automatically be imported into Darktable, setting the White Balance for your image based on the setting you used in-camera at the time of your photo. However, in this tutorial I show you how to tweak the white balance in Darktable to make your photos warmer or cooler, and also go over the various other slider settings in the White Balance module.
-
26
Remove Noise
There are two main types of noise found in photographs - luminance and chrominance (color) noise - both of which I go over in this lecture. I show you the best module to use for removing noise in your photos, which also happens to be one of the easier methods for noise removal thanks to a vert smart feature.
-
27
Image Sharpening
Once a majority of your edits have been applied to your image, you'll want to sharpen your final photo using a sharpening module in Darktable. In this lecture, I cover the best module for the job, which utilizes an "unsharp mask" sharpening technique. Don't worry - I explain what that means in the lecture.
-
28
Adding a Vignette
Vignettes are a great way to add framing around your image while drawing the viewers eye towards the main subject of the photo. I cover the vignette module in Darktable for this lecture and the various settings and sliders found in that module.
-
29
Photo Editing Quiz
Test the photo editing skills and terminology you learned in this section.
-
30
BONUS: Color Temperature Explained with GIMP
Learn more about Color Temperature, using the free photo editor GIMP to demonstrate.
-
31
BONUS: Stealing the Color Grading from a Photo in Darktable
In this Darktable tutorial, which uses Darktabl 3.4, I show you how to steal color grading from one photo and transfer it to another using the Color Mapping module.