Portraiture with Two Speedlights
- Descrição
- Currículo
- FAQ
- Revisões
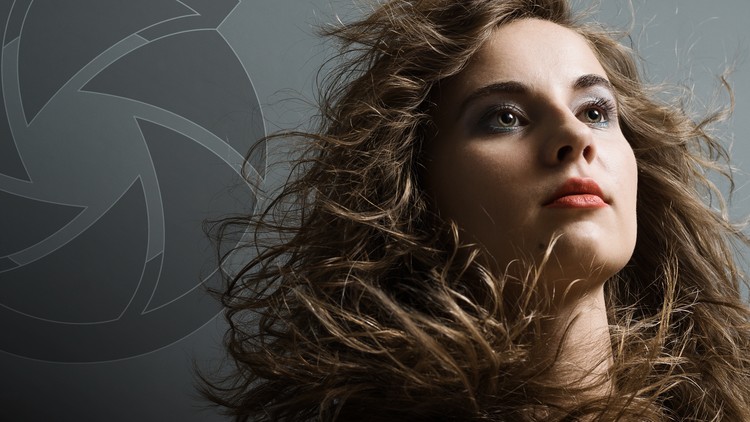
“Portraiture with Two Speedlights” is a course aimed at amateur and intermediate level photographers who wish to learn how to use a couple of speedlights and basic modifiers to enhance their portraiture lighting, and simple yet effective post-processing techniques to enhance the resulting images.
This course is organized in a simple to follow layout, with clear and concise explanations and examples of the subjects being demonstrated. “Portraiture with Two Speedlights” contains over 3 hours of video, as well as workbooks at the end of each chapter with further explanations, examples, and lighting diagrams.
If you always wondered how the pros light their portraits, jump in!
-
1The CourseVídeo Aula
An introduction to Portraiture with Two Speedlights: what will be covered in this course, requirements, and objectives.
-
2Lighting ConceptsVídeo Aula
In this brief introduction to lighting we discuss the concepts that will be used throughout the course, such as light direction, apparent size of the light source and light power.
-
3Using a LightmeterVídeo Aula
In this section we discuss how to use your light meter.
-
4CameraVídeo Aula
In this section we will go through the equipment list required for this course in greater detail, starting with the camera.
-
5SpeedlightsVídeo Aula
Why speedlights? Pros, cons, and how to use them.
-
6TriggersVídeo Aula
How to get your camera to talk to your speedlights: in this section we discuss triggers and their functions.
-
7Light ModifiersVídeo Aula
Light modifiers: what they are, and how they work.
-
8IntroVídeo Aula
In this section we show how to set up for a shoot using a bare speedlight.
-
9Setup & ShootVídeo Aula
In this section we show a shoot with a bare speedlight.
-
10Post-ProcessingVídeo Aula
In this lecture we will go through the post-processing of the image created in the previous lecture. We will take the image straight out of camera and take you through Adobe Lightroom and into Adobe Photoshop.
We will show you how to process your image in Adobe Photoshop to correct colour in skin tones.
The photographs we use in this lecture are the ones that were obtained in our previous shoot lecture, so you will see how each image has been made from start to finish.
-
11IntroVídeo Aula
In this section we show how to set up for a shoot using a shoot-through umbrella as a light modifier.
-
12Setup & ShootVídeo Aula
In this section we show a shoot with a shoot-through umbrella as a light modifier.
-
13Post-ProcessingVídeo Aula
In this lecture we will go through the post-processing of the image created in the previous lecture. We will take the image straight out of camera and take you through Adobe Lightroom and into Adobe Photoshop.
We will show you how to use Adobe Photoshop to correct skin texture.
The photographs we use in this lecture are the ones that were obtained in our previous shoot lecture, so you will see how each image has been made from start to finish.
-
14IntroVídeo Aula
In this section we show you how to set up for a shoot using two umbrella light modifiers.
-
15Setup & ShootVídeo Aula
In this section we show you a shoot with two umbrella light modifiers and how they work in relation to each other.
-
16Post-ProcessingVídeo Aula
In this lecture we will go through the post-processing of the image created in the previous lecture. We will take the image straight out of camera and take you through Adobe Lightroom and into Adobe Photoshop.
We will show you how to process your image, and enhance eye technique.
The photographs we use in this lecture are the ones that were obtained in our previous shoot lecture, so you will see how each image has been made from start to finish.
-
17IntroVídeo Aula
In this section we show you how to set up for a shoot using two umbrella light modifiers in the classic clamshell position.
-
18Setup & ShootVídeo Aula
In this section we show you a shoot with two umbrella light modifiers in a clam shell position.
-
19Post-ProcessingVídeo Aula
In this lecture we will go through the post-processing of the image created in the previous lecture. We will take the image straight out of camera and take you through Adobe Lightroom and into Adobe Photoshop.
We will show you how to process your image, and introduce the technique known as "dodge and burn".
The photographs we use in this lecture are the ones that were obtained in our previous shoot lecture, so you will see how each image has been made from start to finish.
-
20IntroVídeo Aula
In this section we show you how to set up for a shoot using an Octagonal Umbrella Softbox, or "Octabox".
-
21Setup & ShootVídeo Aula
In this section we show you a shoot with an Octagonal Umbrella Softbox or "Octabox".
-
22Post-ProcessingVídeo Aula
In this lecture we will go through the post-processing of the image created in the previous lecture. We will take the image straight out of camera and take you through Adobe Lightroom and into Adobe Photoshop.
We will show you how to process your image, clone out stray hairs, and sharpen your image.
The photographs we use in this lecture are the ones that were obtained in our previous shoot lecture, so you will see how each image has been made from start to finish.
-
23IntroVídeo Aula
In this section we show you how to set up for a shoot using a Square Softbox - the Westcott Apollo 28".
-
24Setup & ShootVídeo Aula
In this section we show you a shoot with a Square Soft box - the Westcott Apollo 28".
-
25Post-ProcessingVídeo Aula
In this lecture we will go through the post-processing of the image created in the previous lecture. We will take the image straight out of camera and take you through Adobe Lightroom.
We will show you how to use split toning in Adobe Lightroom.
The photographs we use in this lecture are the ones that were obtained in our previous shoot lecture, so you will see how each image has been made from start to finish.


